
My constant message to you is that having Sensitivity Labelling in your environment is critical! However, the design and deployment of Labels are often a concern. It is due to the fact that end users need training on the new Labelling Solution and Labelling Taxonomy to understand what Labels should be applied to which data sets.
The Traffic Light System I recently implemented with numerous customers has provided them with the ability to differentiate between Green, Amber, and Red for the labelling deployment and the sensitivity of the data they are working on.
For example: –
- Green: being low severity and often non-encrypted, non-sensitive data
- Amber: being for medium severity, possibly encrypted, for confidential data
- Red: being for high severity, must be encrypted, highly confidential data
The colours and PowerShell commands required are displayed in HEX and are available from the Links section below.
Let me now walk you through setting up this within your environment. This has proven very useful for end users to understand what type of data they are dealing with and what type of label is required to protect that data.
Links:
Here are the Collaboration Links: –
- Specify a Colour for the Label
- Hex Colour Picker
Important Notes: –
- The Unified Labelling Client must be installed for this feature to work.
- At the time of writing the Built-in Client does not support this customisation.
- In order to run the Connect-IPPSSession you must be running the Exchange Online V2 PowerShell Module.
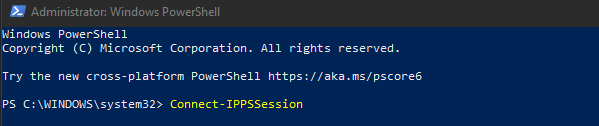
Step: 1
Open PowerShell as Admin
Log onto to the Compliance PowerShell
Connect-IPPSSession
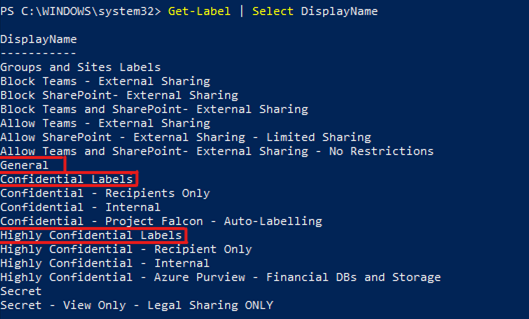
Step: 2
If you then run
Get-Label | Select DisplayName
This will display the Labels you have configured in your environment.
From my Demo tenant, I will be using the following Parent Labels for this session:
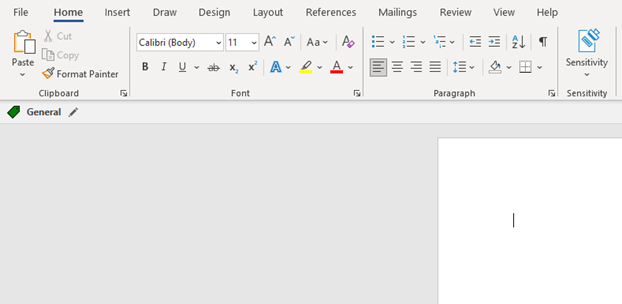
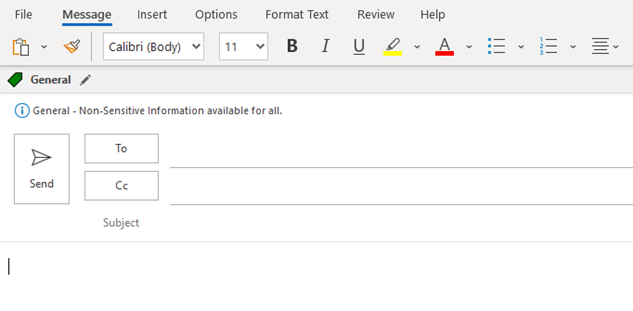
- General
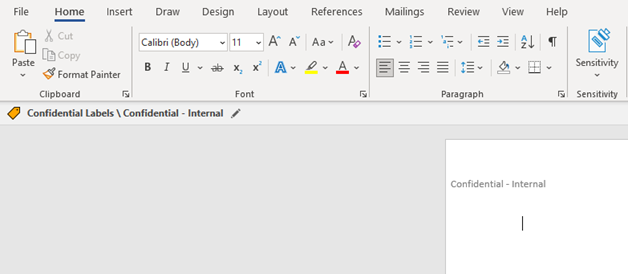
- Confidential Labels
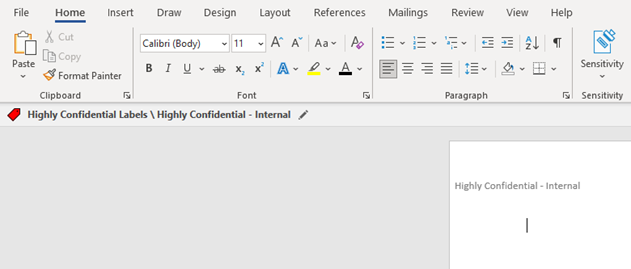
- Highly Confidential Labels
Step: 3
Select the Label you need to apply a colour to, starting with the least important.
Green: –
Set-Label -Identity General -AdvancedSettings @{color=”#008000″}
After running this, it will not display anything and present prompt again

Then run the following to be sure the configuration has been applied
Get-Label -Identity “General” | Select “settings” | fl

Step: 4
Now select the business’s next severity Label
Amber: –
Set-Label -Identity “Confidential Labels” -AdvancedSettings @{color=”#ffa500″}
Again, running this, will not display anything and represent the prompt

Then run the following to be sure the configuration has been applied
Get-Label -Identity “Confidential Labels” | Select “settings” | fl

Step: 5
Now, select the last and highest Label the business has
Red: –
Set-Label -Identity “Highly Confidential Labels” -AdvancedSettings @{color=”#ff0000″}
Again, running this, will not display anything and represent the prompt

Then run the following to be sure the configuration has been applied
Get-Label -Identity “Highly Confidential Labels” | Select “settings” | fl

Important Note:
Once you have ran the commands it can take one hour, or so, to show on the client side.
Step: 6
Now, let’s check the Label configuration in Office.
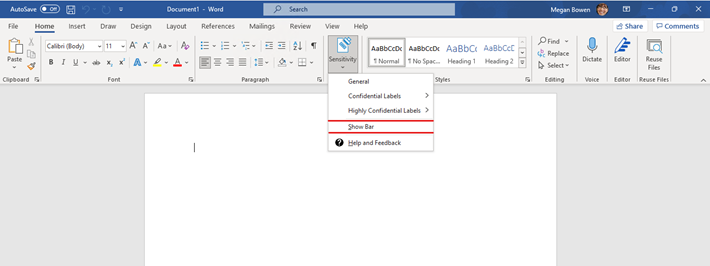
Note:
You must have the AIP Unified Labelling Client Bar displayed to view the colours on each of the labels. The colours are only visible when you hover over the label(s) within the Bar. If you do not see the Labels, click on the Sensitivity option, and select Show Bar, as the below shows.
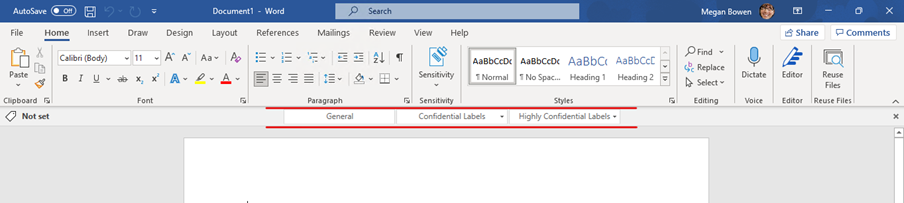
As the below indicates, Green has been applied to the General Label, Amber to the Confidential Labels and Red to the Highly Confidential Labels.
Once the user has selected the Label required, the Label and the colour will be displayed in the top-left-hand corner of Word or Outlook as indicated below. Therefore, clearly displaying the Label and its Sensitivity.
Word Example
Outlook Example
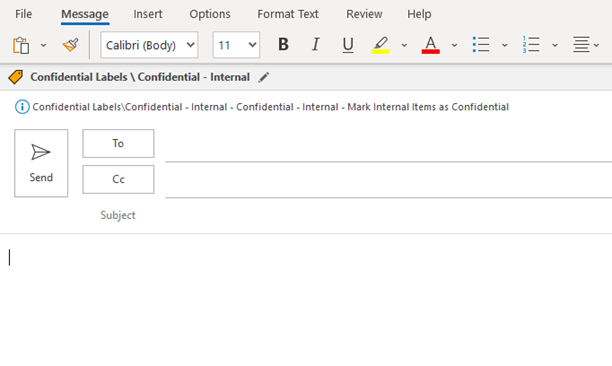
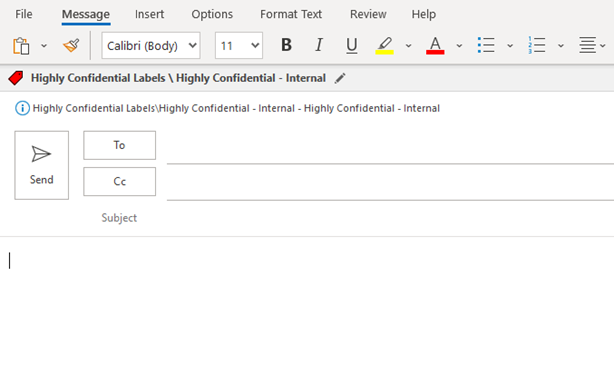
As you can see, using the Traffic Light system to offer a colouring scheme for your organisational labels, provides end users a means of recognising the severity of the labels. Consequently, offering them an easier way to acknowledge the data they are working with and the label severity to apply.