
1. Introduction on Co-Authoring with Sensitivity Labelling
Apologies, I am a little late getting this one out due to work commitments.
Nothing too in-depth for this blog, I just wanted to share how to get up and running with Co-Authoring as I know this has been a topic of discussion, lately.
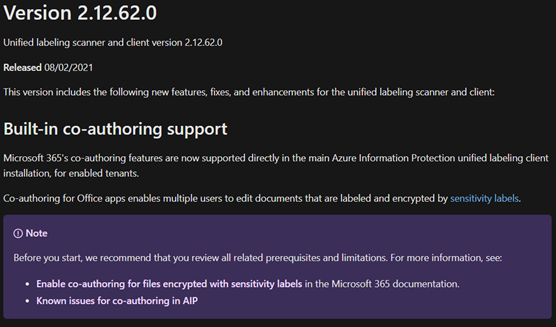
If you are using Microsoft; Word, Excel, and PowerPoint documents, encrypted with sensitivity labels, Co-Authoring is now available for Windows and Mac. This feature is already available on Office for the Web.
Having an information protection labelling solution rolled out is excellent and, in my opinion, an extremely important step in your data protection journey. However, until now colleagues who are working in partnership on documents were unable to Co-Author them when it had been configured with a label that had encryption enabled. Therefore, you or your colleagues simply had to sit and wait your turn or, avoid applying the sensitivity label to the document until after it had been completed. That is an option; however, it is not advisable if you are composing a document that contains highly sensitive information.
Furthermore, when enabling Co-Authoring, this will in addition enable the AutoSave functionality for labelled and encrypted documents and files.
However, do note the following unsupported scenarios: –
- Let users assign permissions when they apply the label and the checkbox in Word, PowerPoint, and Excel, prompting users to specify permissions. This configuration is sometimes referred to as User-Defined Permissions or Recipient Only Permissions.
- User access to content expires is set to a value other than Never.
- Double Key Encryption is selected.
For labels with any of these encryption configurations, the labels display within the apps. However, when users select these labels and nobody else is editing the document, they are warned that co-authoring and AutoSave is not available. If somebody else is editing the document, users see a message stating that labels cannot be applied.
Important Notes: –
- Turning this feature ON will require you to contact Microsoft Support for it to be turned OFF again.
- In companies that do not currently have Sensitivity Labelling enabled for SharePoint and OneDrive, turning on Co-Authoring will enable this capability automatically.
- As always be sure to test this feature out in a test environment beforehand!
Let’s get started!
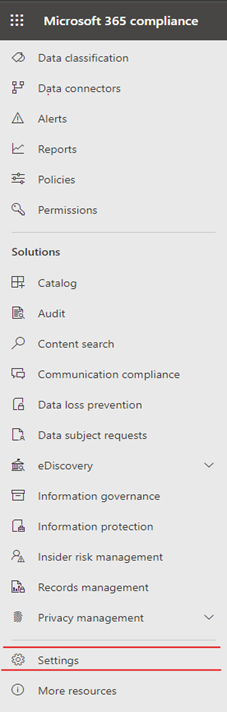
2. Logging on to Compliance Centre
Open a browser and log into Home – Microsoft 365 compliance
You must be a Global Administrator turn this feature on.
3. Unified Labelling Client Version Requirements
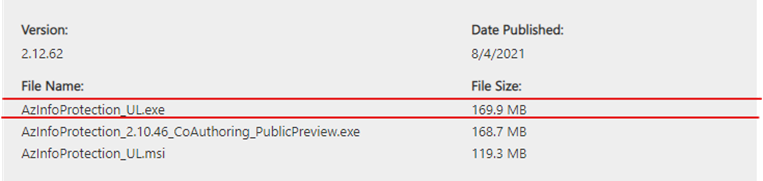
The required Unified Labelling Client that supports Co-Authoring is detailed below. This must be installed for you to use Co-Authoring.
Link: – What’s new in Azure Information Protection (AIP) – Version history & support policy | Microsoft Docs
As you will notice below, there is a version _2.10.46_CoAuthoring_PublicPreview – you do not need this version only the ‘AzInforProtection_UL.exe or MSI if there is a requirement to roll this out to a large number of devices.
Link: – Download Microsoft Azure Information Protection from Official Microsoft Download Center
4. Application Version Requirements
Windows: Minimum version 2107+
macOS: Minimum version 16.51+
iOS: Not yet supported
Android: Not yet supported
OneDrive Sync App for Windows & macOS: 19.002.0121.0008+
Endpoint data loss prevention (Endpoint DLP): Windows 10 1809 with KB 4601383 – Windows 10 1903 and 1909 with KB 4601380 – Windows 10 2004 with KB 46013 – Windows versions later than Windows 10 2004 are supported without KB updates.
MIP SDK: 1.7+
Collaborating Links: –
5. Labelling Metadata Changes
Microsoft has mentioned that Metadata changes take place when you enable Co-Authoring, therefore, you must check to see if your organisation is affected.
Microsoft Quote:
“After you enable the setting for co-authoring, labeling information for unencrypted files is no longer saved in custom properties. Do not enable this setting if you use any apps, services, scripts, or tools that reads or writes labeling metadata to the old location.”
Be sure to review the link below for the Metadata Changes for Sensitivity Labelling, before proceeding to enable this feature!
Collaborating Links: –
- Metadata Changes for Sensitivity Labelling
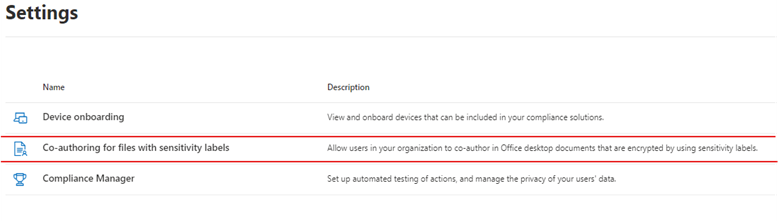
6. Navigating to Global Compliance Settings
Once logged in, navigate to Settings as displayed below.
7. Selecting the Co-Authoring for Files with Sensitivity Label
Select the highlighted option to enter the Co-Authoring Settings
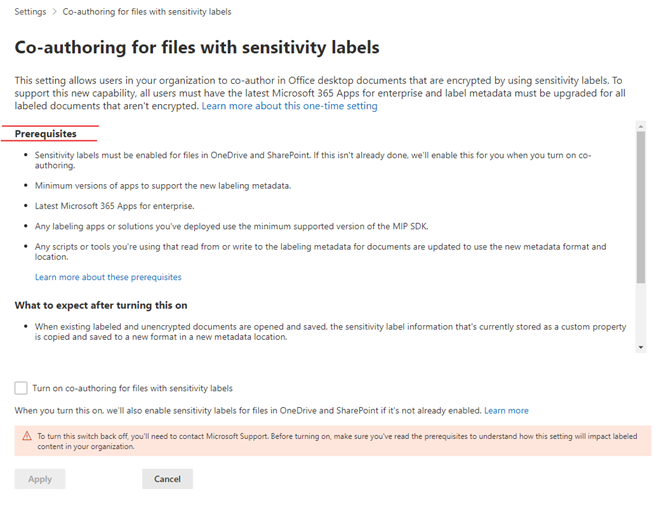
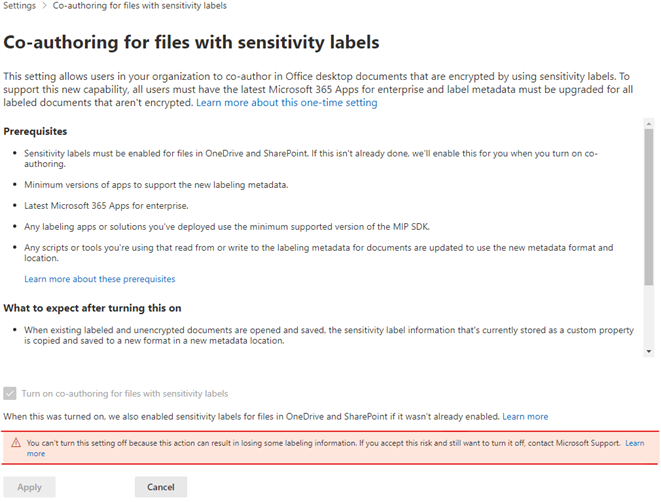
8. Reviewing The: Prerequisites
Within the Settings be sure to read and understand the prerequisites detailed below, before continuing.
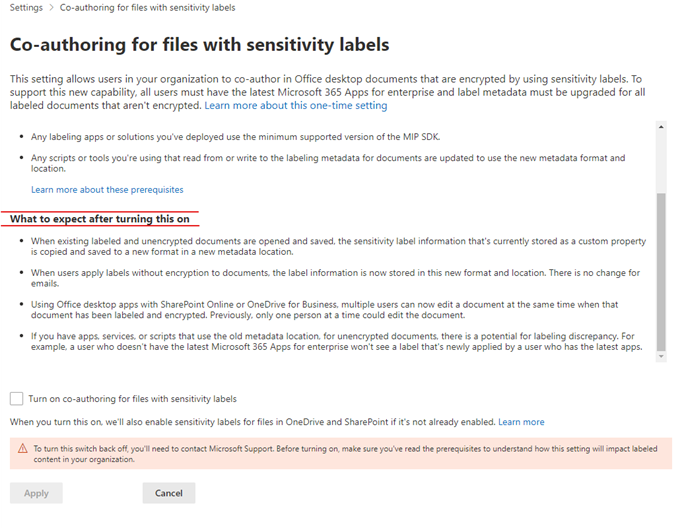
9. Reviewing The: What to Expect After Turning This On
Additionally, be sure to read the expectations of turning this on.
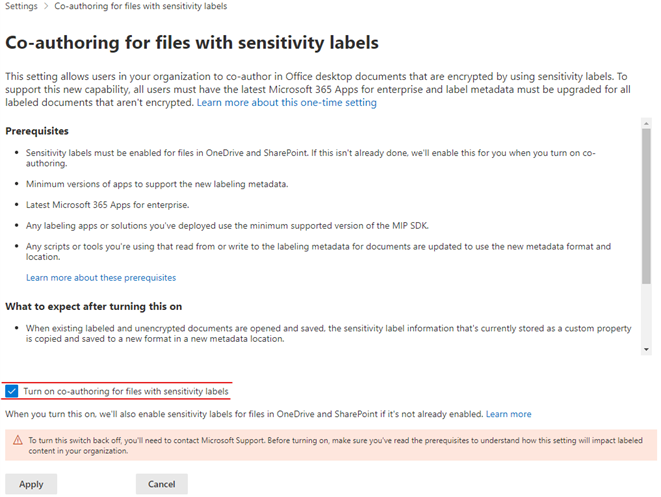
10. Switching On Co-Authoring For Files with Sensitivity Labels
Click on the tick box to Turn On Co-Authoring
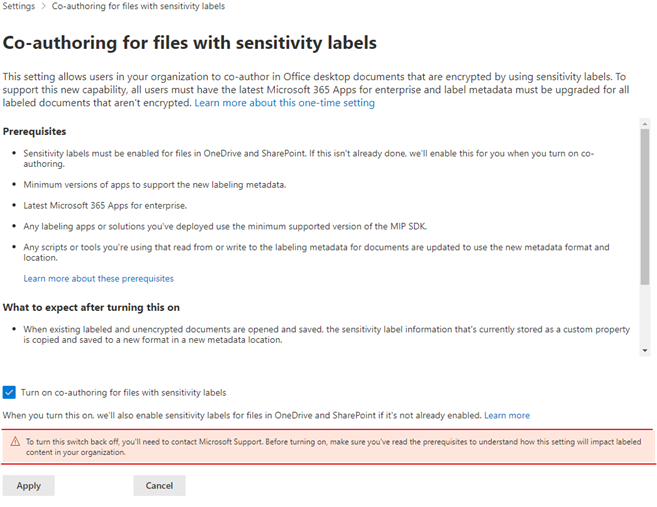
11. Switching On: Warning Before Enablement
Make sure you have read the information within the highlighted area. Once you switch this on, you must contact Microsoft support to switch it off.
Click Apply to Turn On
12. Switching On: Warning After Enablement
As stated in the below highlighted Caution section, now this is enabled, it is not recommended to turn the feature off again. Be sure to test this out in a non-production environment.
That’s it!
You have successfully enabled Co-Authoring in your tenant.